Purging the Recycle Bin |
 Previous |
When you drop objects, space is not freed until you purge the recycle bin, or until the database automatically purges the recycle bin when it detects a low space condition. You can purge individual objects or you can purge all contents of the recycle bin. When you purge all contents of the recycle bin, only the objects that you own are purged.
Purging All Contents of the Recycle Bin
To purge all contents of the recycle bin:
-
Access the Database Home Page and log in as the owner of the schema of interest.
See "Accessing the Database Home Page" for instructions.
For example, if you want to purge the recycle bin of objects owned by user
NICK, log in asNICK. -
Click the Utilities icon, and then click the Recycle Bin icon.
-
Click the Purge Recycle Bin icon.
A page appears that prompts you to confirm the operation.
-
Click the Purge Recycle Bin icon again.
A confirmation page appears.
Purging an Individual Object from the Recycle Bin
To purge an individual object from the recycle bin:
-
Access the Database Home Page, and log in as the owner of the schema of interest.
See "Accessing the Database Home Page" for instructions.
-
Click the Utilities icon, and then click the Recycle Bin icon.
-
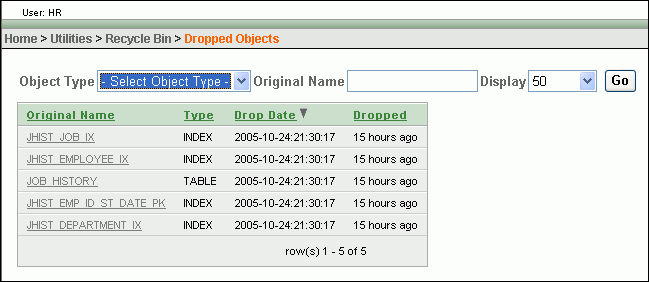
Click the Dropped Objects icon.
The Dropped Objects page appears, displaying dropped objects in a list.

Description of the illustration dropped_objects.gif
-
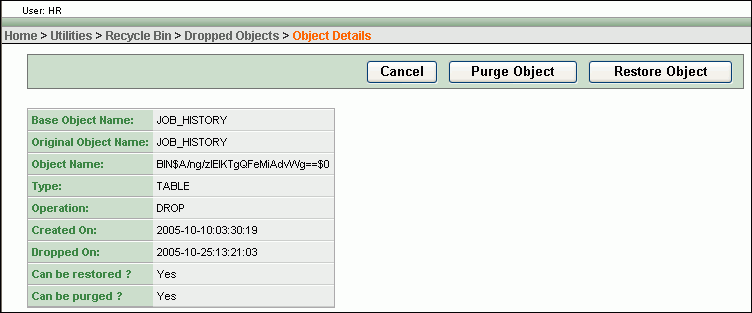
Under the Original Name column, click the name of the object that you want to purge.
The Object Details page appears, displaying information on the object.

Description of the illustration dropped_object_details.gif
-
Click Purge Object.
A confirmation page appears. The object and all of its dependent objects are purged.